

Step-by-Step Guide to Block Wall Building
- travis81tenhoff9
- Feb 10
- 4 min read
Building a block wall is a practical and durable solution for many outdoor construction needs. Whether you want to create a boundary, a retaining wall, or a decorative feature, understanding the process of block wall building is essential. I will walk you through each step, providing clear instructions and helpful tips to ensure your project is successful. This guide is designed to be straightforward and accessible, so you can confidently tackle your block wall project.
Preparing for Block Wall Building
Before you start laying blocks, preparation is key. Proper planning and site preparation will save you time and prevent costly mistakes.
Assess the site: Check the ground where the wall will go. It should be level and free of debris.
Measure and mark: Use stakes and string to outline the wall’s path. Double-check measurements to ensure accuracy.
Gather materials and tools: You will need concrete blocks, mortar mix, a trowel, level, tape measure, wheelbarrow, shovel, and safety gear.
Check local regulations: Some areas require permits or have height restrictions for block walls. Verify these before starting.
Taking these steps seriously sets a solid foundation for your block wall building project.

Laying the Foundation and Footing
A strong foundation is the backbone of any block wall. The footing supports the wall and prevents shifting or cracking over time.
Excavate the footing trench: Dig a trench along the marked line. The width should be about twice the width of the blocks, and the depth depends on the wall height and soil conditions.
Add gravel base: Pour 4 to 6 inches of compacted gravel into the trench to improve drainage.
Pour concrete footing: Mix and pour concrete into the trench. Use a level to ensure the surface is flat and even.
Allow curing time: Let the concrete cure for at least 24 to 48 hours before proceeding.
This footing will provide the necessary support for your block wall building and ensure long-term stability.
How deep should the footing be for a 6 foot block wall?
For a 6-foot block wall, the footing depth is critical to maintain structural integrity and safety. Generally, the footing should be at least 12 inches deep and twice the width of the block. This means if your blocks are 8 inches wide, the footing should be about 16 inches wide.
In colder climates, the footing must extend below the frost line to prevent frost heave. This depth varies by region but is typically between 30 and 48 inches. Always check local building codes for specific requirements.
Proper footing depth prevents the wall from leaning or cracking over time, especially for taller walls like a 6-foot structure.
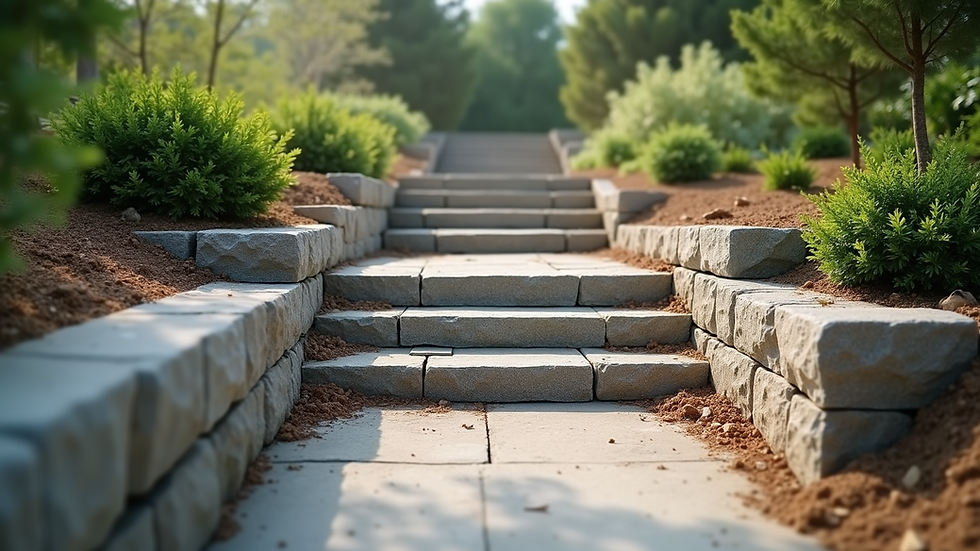
Building the Block Wall: Step-by-Step
Now that the foundation is ready, it’s time to start the actual block wall building.
Mix the mortar: Follow the manufacturer’s instructions to prepare a workable mortar mix.
Lay the first course: Spread a layer of mortar on the footing. Place the first block at one end, tapping it gently into place. Use a level to check for evenness.
Continue laying blocks: Apply mortar to the ends of each block before placing it next to the previous one. Maintain a consistent mortar joint thickness, usually about 3/8 inch.
Check alignment and level: Use a string line and level frequently to keep the wall straight and level.
Stagger joints: For strength, offset the vertical joints in each row by half a block.
Cut blocks as needed: Use a masonry saw or chisel to cut blocks to fit corners or ends.
Fill cores with concrete: For added strength, fill the hollow cores of the blocks with concrete and insert rebar vertically at intervals.
Tool the joints: Once the mortar begins to set, smooth the joints with a jointer for a clean finish.
This methodical approach ensures your block wall is both strong and visually appealing.

Finishing Touches and Maintenance
After the wall is built, some finishing steps will enhance its durability and appearance.
Cure the mortar: Keep the wall moist for several days to allow the mortar to cure properly.
Apply a sealant: Use a masonry sealant to protect the wall from moisture and weather damage.
Backfill carefully: If the wall is retaining soil, backfill with gravel and compact it to prevent pressure on the wall.
Inspect regularly: Check for cracks or loose blocks and repair promptly to maintain the wall’s integrity.
Proper maintenance extends the life of your block wall and keeps it looking its best.
Why Choose Professional Block Wall Construction?
While this guide provides a comprehensive overview, some projects benefit from professional expertise. Block wall construction requires precision and knowledge of materials and local codes. Professionals like Titan Rockeries and Construction LLC offer:
High-quality materials tailored to your project
Expert installation ensuring durability and safety
Innovative solutions for both residential and commercial needs
Choosing a trusted provider guarantees your block wall will stand strong and enhance your property for years to come.
By following these steps, you can confidently approach your block wall building project. From preparation to finishing, each phase plays a vital role in creating a sturdy, attractive wall. Whether you do it yourself or hire professionals, understanding the process helps you make informed decisions and achieve the best results.


Comments